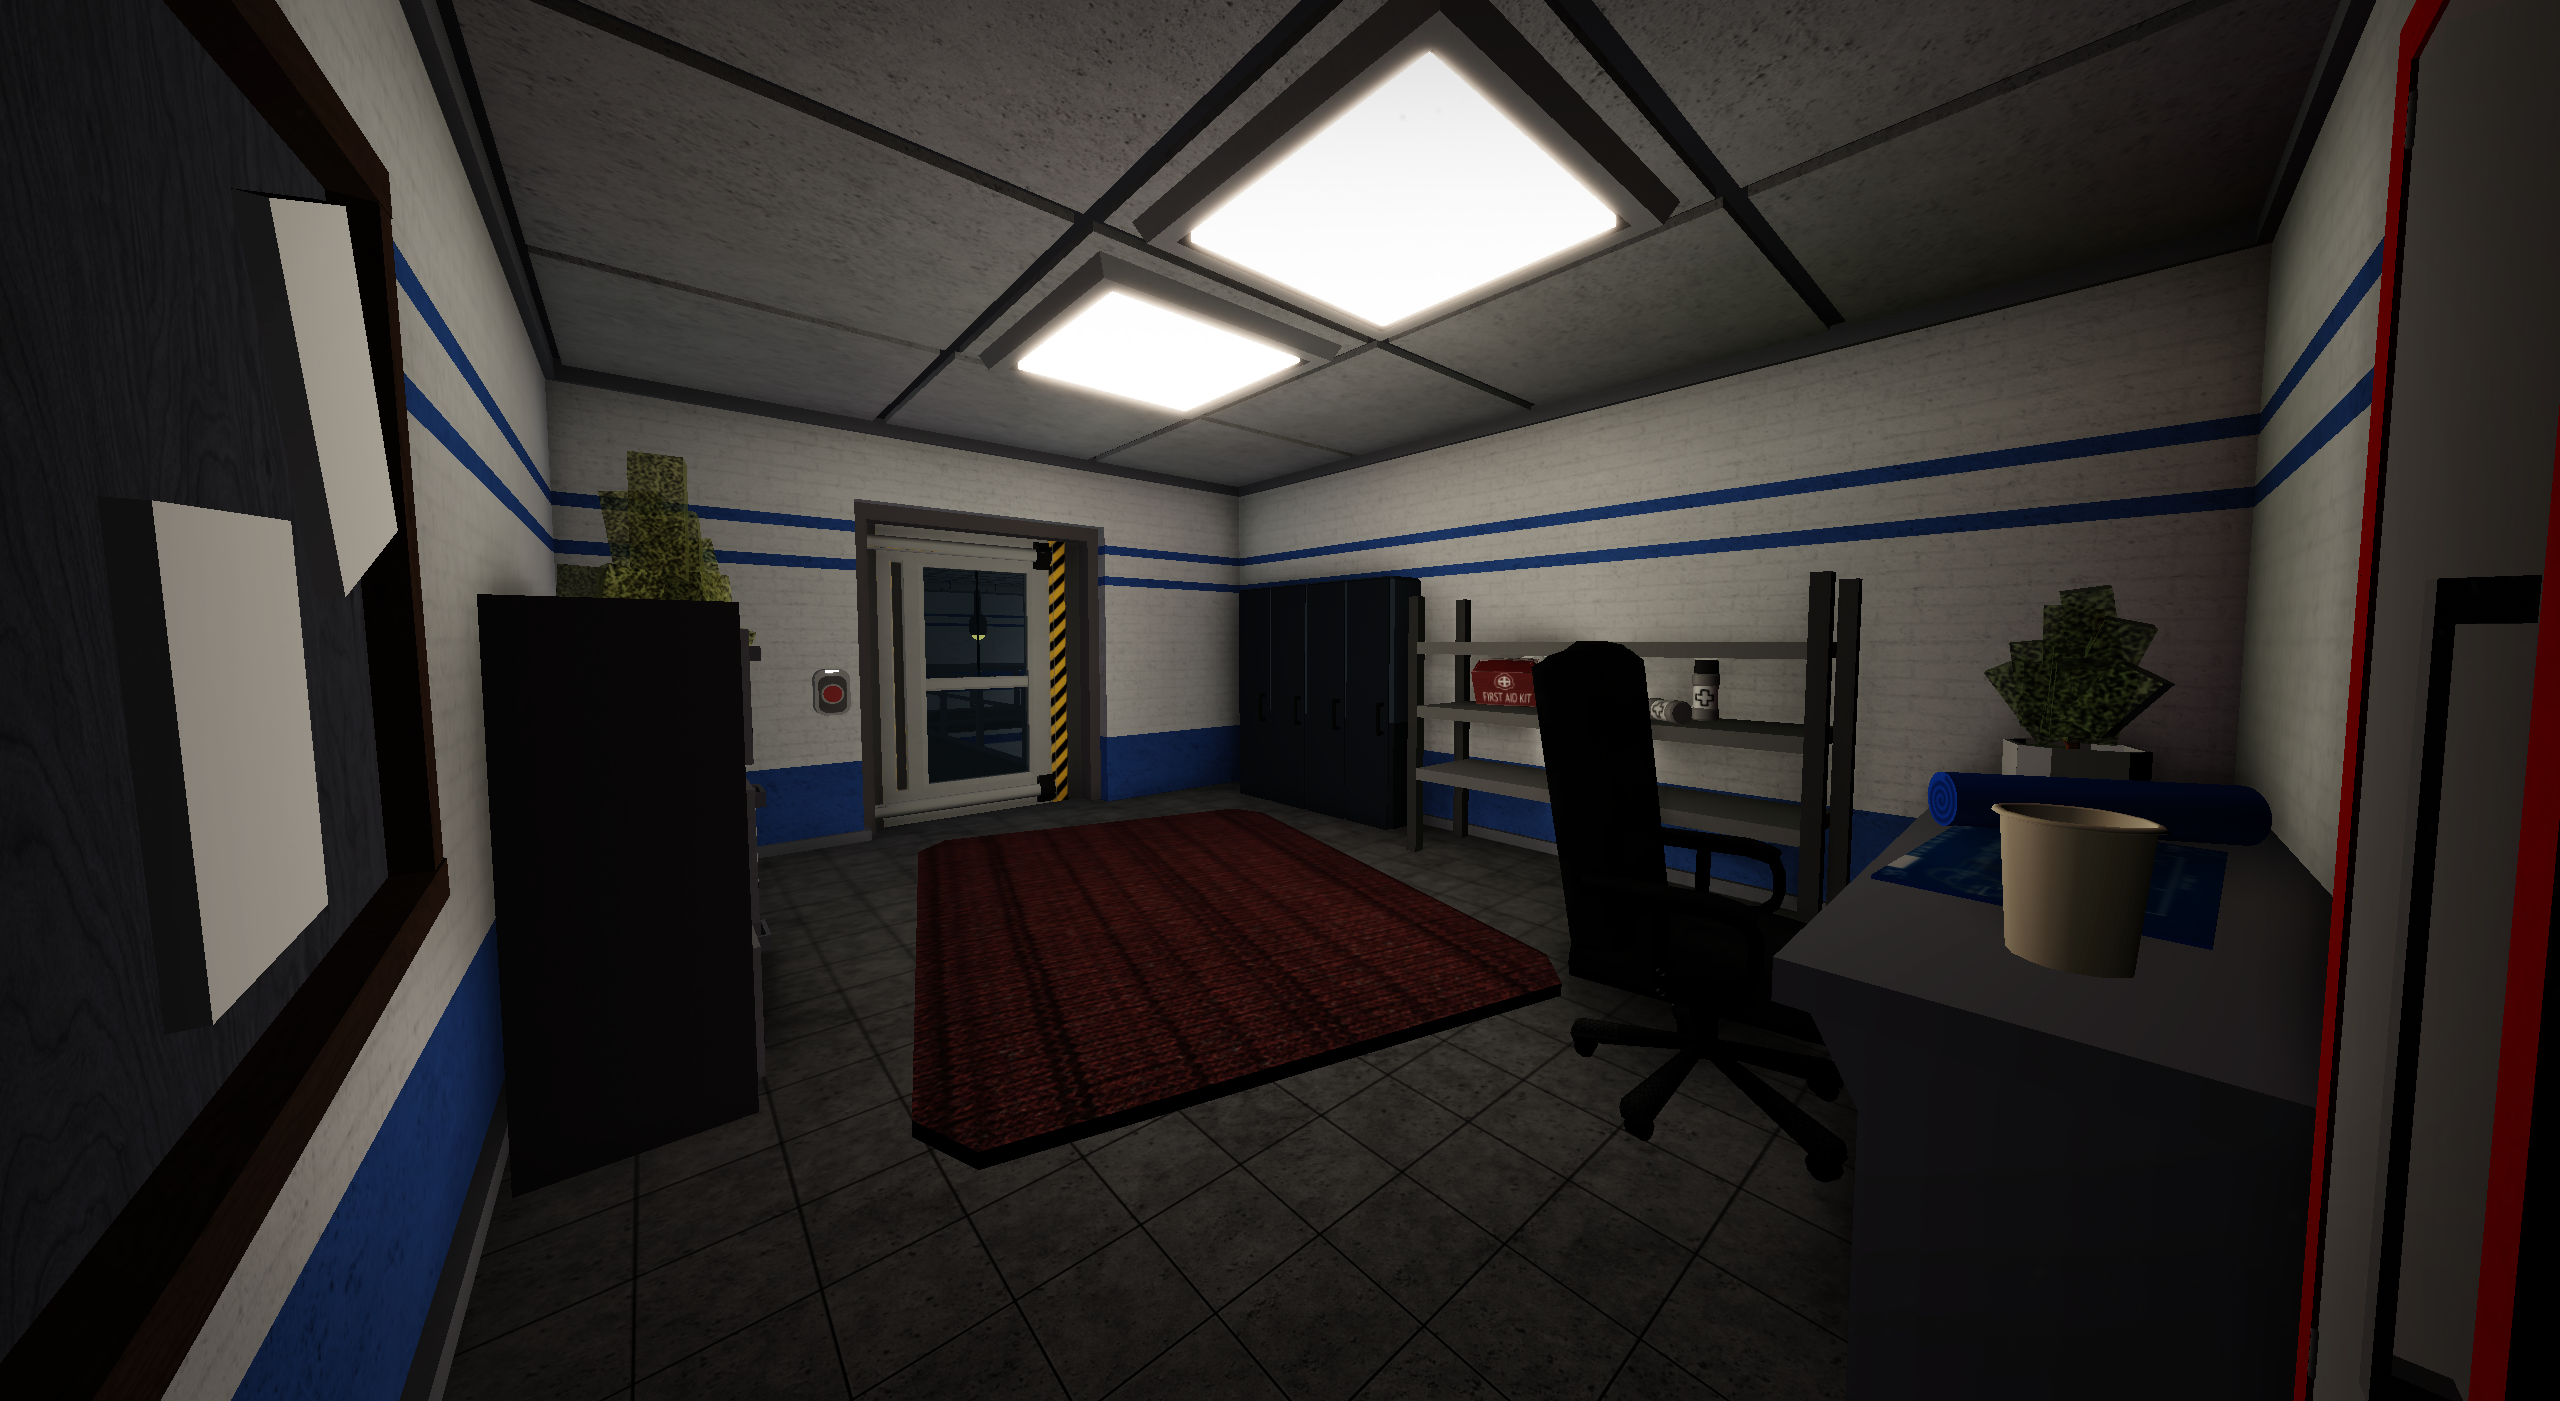
¶ Custom Rooms
This page will serve as a guide to configuring your custom rooms for use in community servers or submitting them in the #pscp-submissions channel on the official Project: SCP Discord server. You’ll find instructions and best practices to ensure your custom rooms are optimized for gameplay and meet submission criteria. This guide will help you contribute to the Project: SCP community regardless.
To create custom rooms, your device must be able to run Roblox Studio.
⚠ Map submissions that contain custom rooms will not be accepted. ⚠
¶ Resources
These following resources are extremely important and are required for the creation of custom rooms for official submissions and community servers.
- Prop Kit Model that contains official game props
- Room Templates Model that contains templates of all hallways
- Door Kit Model that contains every official door
- Material Kit Model that contains a kit of materials.
Only Official Materials will be accepted for official room submissions
Made for P:SCP Custom Rooms
- PSCP Room Saver V5 Required for rooms used in Community Servers or Custom Maps
- PSCP Commandbar Utilities Useful for automatically formatting rooms by the usage of commands
Useful 3rd Party Plugins
- stravant’s ResizeAlign Useful for connecting 2 parts exactly by using the resizing tool
- stravant’s GapFill & Extrude Useful to fill gaps between parts automatically.
Not recommended to use frequently because it may use too many parts and might misplace some - stravant’s Model Reflect Use this to reflect (copy and paste in the exact opposite position and rotation) models
- Building Tools by F3X Specific tools to modify, move and resize parts
Beware of moving doors with it, as it breaks weld constraints
- GitHub Required for rooms used in Community Servers
- RobloxStudio Download Roblox Studio by going to this page
- Official LCZ Room Making Guide Document Written by official builders, explains in detail how to build LCZ-style rooms
¶ Building the Room
Now, if you have all templates and plugins ready, you can begin making your room. The first step is to make the room have the appropriate sizes that you want it to have. This depends on the room you’re creating/remaking. Once you have the general shape, you will shape it to fit your standards and how you want it to be in the end. Once you’re done doing this, you will utilize the Prop Kit by ungrouping it and then putting the decoration parts you want into the room. If you’re sure you did a great job, make sure to anchor everything!
¶ Room Configuration
This part will explain how to configure main and essential parts of a room, such as floors, and specific room configuration parts that will interact with the player, like killbricks and intercom part.
Every room needs a part named Floor and requires it to be its Primary Part, or else it cannot be placed within the map.
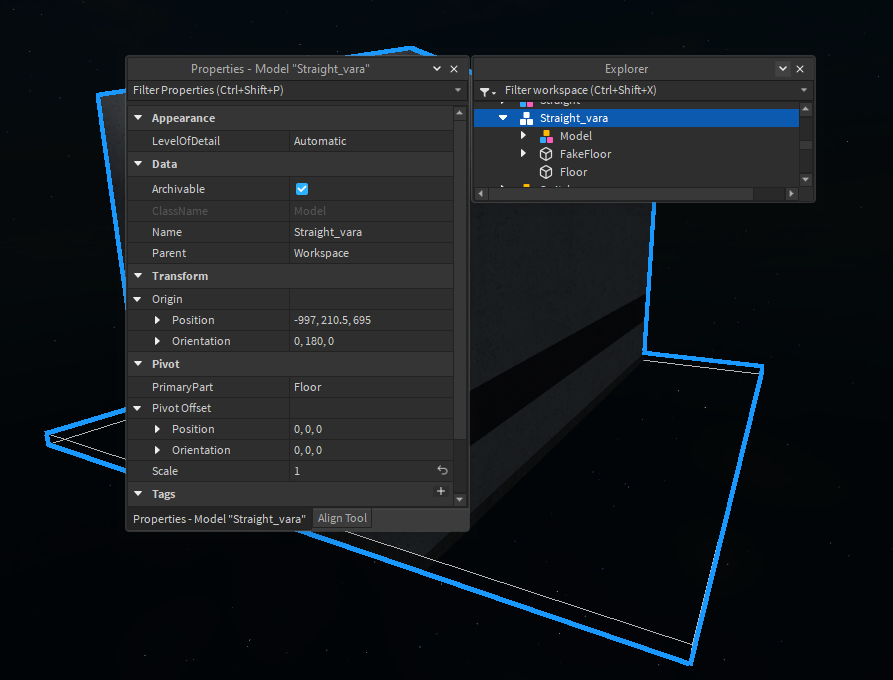
You can edit a room’s properties by adding a Folder named Config within the main model.
Additionally, at the bottom of the folder properties, press the + button to the right of Attributes to create a new attribute, these will control what is being modified. Only two things can be modified as of now.
| Name of Config | Attribute Type | What it does |
|---|---|---|
| hasdecontamination | boolean | Allows you to manually set if a room has decontamination. All rooms in LCZ will have this enabled by default. |
| ignorenuke | boolean | Allows you to manually set if a room ignores the Alpha Warhead detonation. All rooms will have this disabled by default. |
Parts placed within a folder named Breakable can be destroyed by the player with a weapon, or some SCPs.
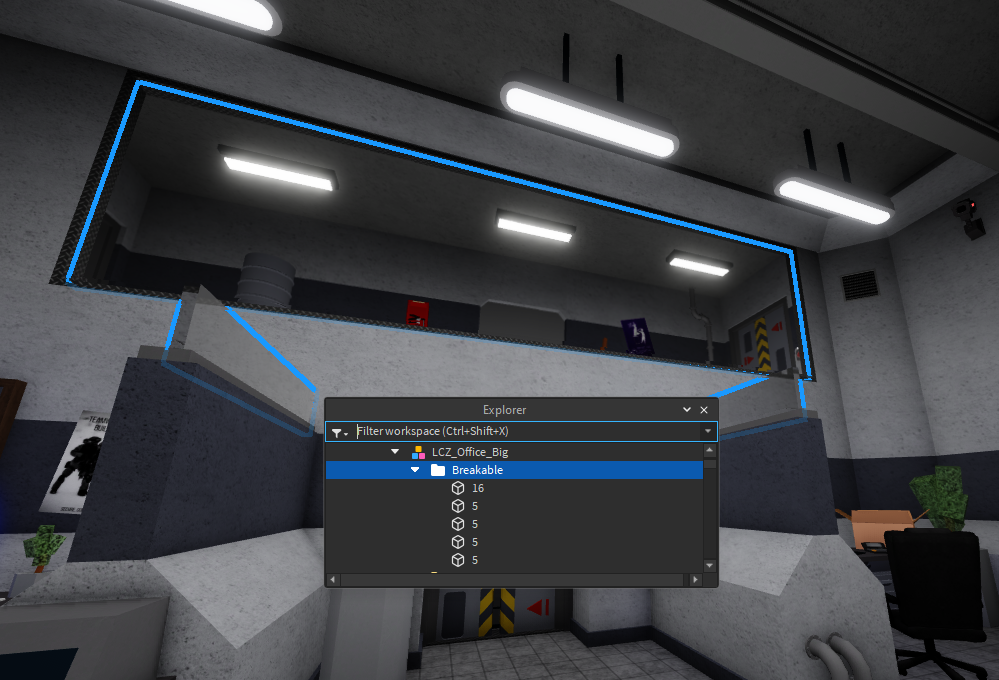
Naming a breakable part a # will set the number of fragments it will break into. The amount of fragments it breaks into is the number squared. Example: Part name: "5" Number of parts it will fragment into when broken: 25
There are two Pocket Dimension Exit types you can make in custom rooms.
Naming a part 106_PORTAL_EXIT_RANDOM will allow the room to be a potential exit point for players while escaping SCP-106’s Pocket Dimension. Only 1 random portal exit can be placed in a room.
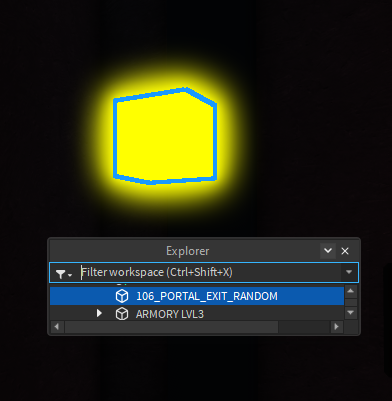
Naming a part 106_EXIT sets it as the exit for SCP-106 when he is leaving his dimension. There can only be 1 in the entire map. This part is in SCP-106’s containment chamber by default.
Killbricks should be placed in a folder named KillBricks. They kill players instantly upon touching them.
Naming a part KillBrick will make it kill any player that touches that part.
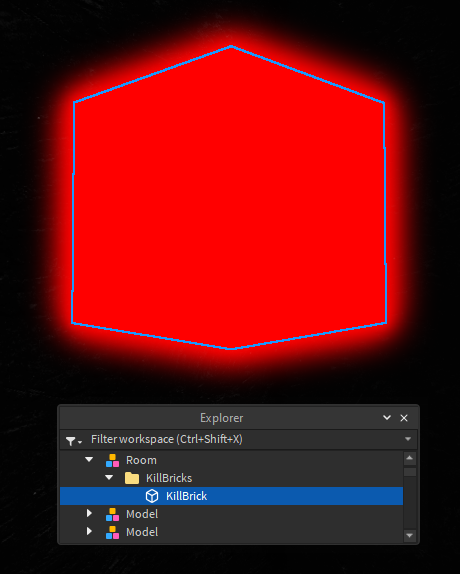
To give the killbrick a custom death reason, create a new folder inside the Killbricks folder with your custom death reason (For example, Tried to touch death) and put your killbrick inside that folder.

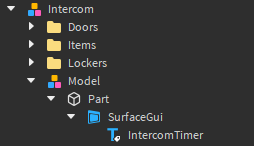
In order to create a custom room with an intercom, a part named Intercompos must be present in the room. For the intercom timer, a part which has a SurfaceGui and TextLabel named as IntercomTimer in the SurfaceGui must be present in the room aswell.


In order to make a nuke button and a nuke toggle, create an attribute named interaction, and set it as nuke. Below it, create another attribute named Subtype and set it as one of the values below:
| Subtype | What it does |
|---|---|
| Start | This is to start nuke. |
| Toggle | This is for toggling nuke. |
| Cancel | This is to cancel nuke. |
This is how they should look like in studio


If you wish to make a button have different attributes, put them together in this button
In order to make a blackout button, you need to insert into a Doors folders, and name it BlackoutButton, which acts like the generator does.
To make a femur breaker button, you need to give a Interaction attribute named kill106, which does as stated.
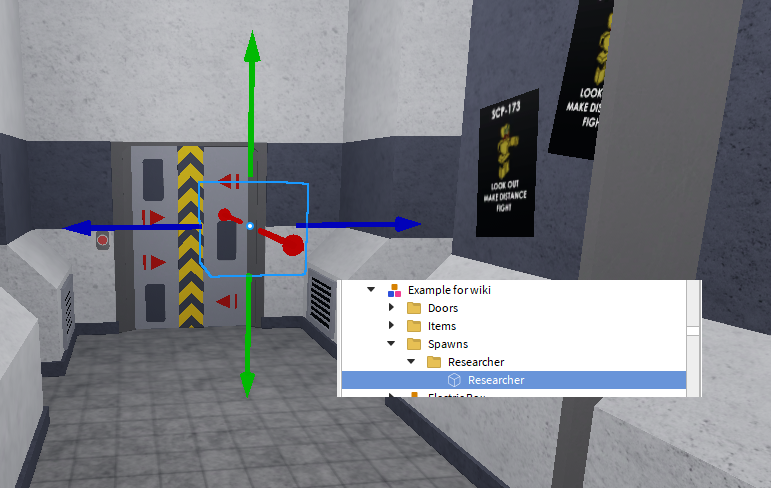
In order to make a spawn for a certain class, you must make a part and name it as the same of the class in the game (i.g. Researcher, Facility Guard, etc), or else it will not work.
After that, create a folder with the same name you put for the part, and put it inside another folder called Spawns, which will be located inside the room model.
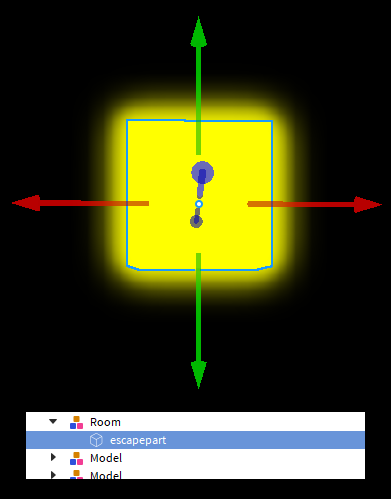
To make an escape area, make a part and name it escapepart, and upon touching this part the player will escape.
This part will teach you how to configure interactable props, and how to make and change how they spawn, and models in the Prop Kit, such as doors and lockers.
Items and Ammo will only work once placed under the Items folder.
The items found in the Prop Kit have an IntValue called spawn_chance, its value is an integer. It’ll be the chance of the item spawning as a percentage.
For example, setting it to 10 will make the item have a 10% chance of spawning.
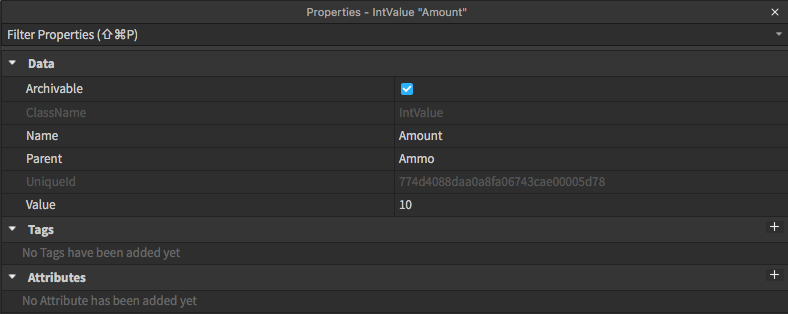
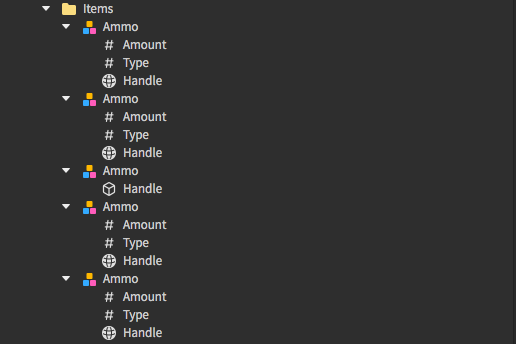
ItemGivers only work once placed under the ItemGivers folder.
ItemGivers are essentially items, although they stay after being picked up and are customizable (for example, adding a limit on how many items you can take of each, cooldown, force-equip the item, etc)
To create an ItemGiver you have to create a folder named ItemGivers, and then the folder for your ItemGiver which can be named anything, and inside of it add the items.
¶ ItemGiver Config
To customize the ItemGiver, inside the folder you created for it, you will add another folder named Config, where you will use Attributes to set the configuration for it.
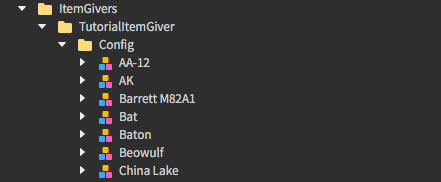
| Name of Config | Type | What it does |
|---|---|---|
| CooldownType | ItemGiverLimiter | Determines the behavior for cooldown. |
| UsageLimitType | ItemGiverLimiter | Determines the behavior for limit. |
| Limit | number | The limit of how many items can be picked up, modified by UsageLimitType. |
| Cooldown | number or true |
If true, it’ll have an infinite cooldown (basically you can only take one). |
| IgnoreInventorySize | boolean | If true, it’ll ignore the limit of inventories when taking an item from the Item Giver. |
| KeepAppearance | boolean | Keeps the appearance of the items. If disabled, the items are replaced by what they should look like. |
| ForceEquip | boolean | If true, it will force the player to equip the item after picking it up. |
| ReplaceEquipped | boolean | If ForceEquip is enabled, it replaces the current held item. |
The CooldownType and UsageLimitType are strings and use the ItemGiverLimiter types which are specified in the second tab.
Used by CooldownType and UsageLimitType configs.
| Type | What it does |
|---|---|
| Player | The player becomes unable to use the ItemGiver temporarily. |
| AllPlayers | All the players become unable to use the ItemGiver temporarily. |
| PlayerItemOnly | The player becomes unable to get the item that was given. |
| AllPlayersItemOnly | All players become unable to get the item that was given. |
Place all lockers in a folder named Lockers within your main model.
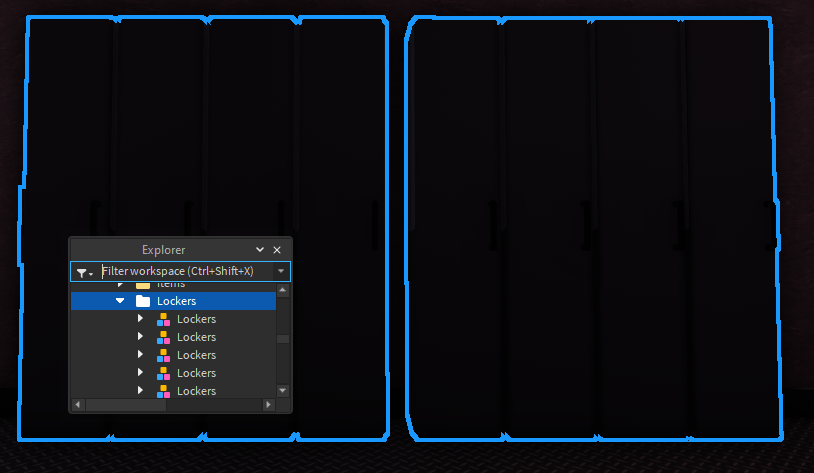
Doors, Gates, Cabinets, and Checkpoints will only work when placed into the Doors folder.
A door can have multiple buttons as long as they’re named Button.
You can edit a door’s access value by adding a StringValue named Access within the door. If you’re using doors that are in the propkit, this step is not needed as they already have it, and you only have to modify it.
Keep in mind that forgetting to add the Access in doors will make the door not spawn once exported.
Doors named gate, Airlock, LCZCheckpoint, Checkpoint, buttoncover, cabinet all have predefined configs, with LCZCheckpoint opening for the last 30s of decontamination.
| Door Access Values | ||
|---|---|---|
| armory_1 | armory_2 | armory_3 |
| cont_1 | cont_2 | cont_3 |
| manage_1 | manage_2 | manage_3 |
| detonate | nuke | |
| all | checkpoint | gate |
If you want to make a door only be opened with an O5 Keycard, set the
Accessvalue asarmory,contormanageand any number above 3 (e.g.cont_4)
You can make custom door access values. The process is the same as giving a door access, but instead of using any of the default accesses you will make a custom one such as specialdoor. You can also give them levels, such as specialdoor_1. To make it work, you will have to combine this process with Hook Functions
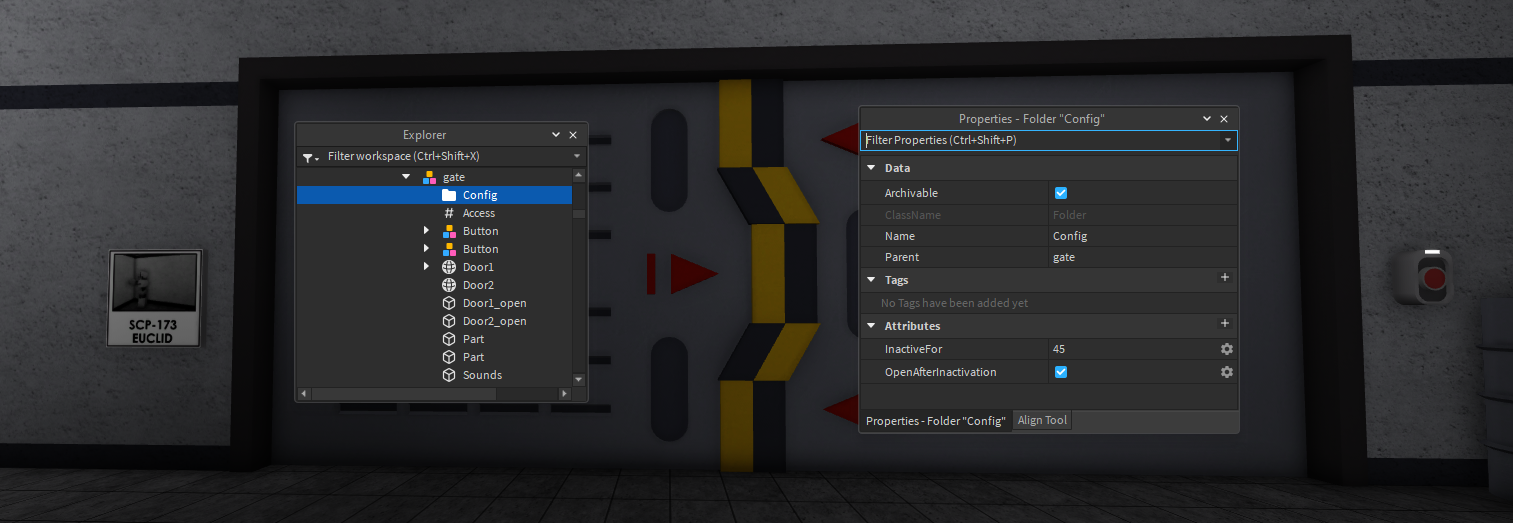
You can edit a door’s properties by adding a Folder named Config within the door’s model.
Additionally, at the bottom of the folder properties, press the + button to the right of Attributes to create a new attribute, these will control what is being modified.
| Name of Config | Attribute Type | What it does |
|---|---|---|
| OpenTime | number | How long till the door is fully opened or closed. |
| OpenDelay | number | How long before starting to open or close. |
| Cooldown | number | Duration where the door is unresponsive after opening or closing. |
| ServerMoved | boolean | If true, the door will be opened on the server side. |
| CanBurn | boolean | Permits or Disallows SCP-457 from buring the door. |
| SCP096BehaviorType | number | (while enraged) 0 = SCP-096 can break; 1 = SCP-096 can’t break, but can open; 2 = SCP-096 cannot open or destroy the door. |
| CanSCPsBypass | boolean | Allows SCPs to ignore the door access value when enabled. |
| NoLegacyAccess | boolean | When enabled, disallows SCPs from opening doors when the value is set to checkpoint. |
| GhostBlock | boolean | If true, prevents “ghosts”(SCP-106) from passing through the door. |
| CanBlow | boolean | Allows grenades to destroy the door. |
| CanBlowBypassAccess | boolean | Allows grenades to destroy the door regardless of the access value. |
| AutoClose | boolean | Checkpoint-like behavior. |
| AutoCloseDelay | number | How long until the door automatically closes if AutoClose is enabled. |
| AutoCloseRepeatOpenSound | boolean | Disables repeating open & close sound for autoclose. |
| AutoCloseSoundName | string | Sets the door’s auto-closing sound to a sound within the door. |
| AutoCloseSoundDelay | number | How long until playing the designated sound. |
| AutoCloseSoundIndependent | boolean | Does the AutoClose sound have to be within the AutoCloseDelay |
| NoReplaceButtons | boolean | Prevents buttons being replaced with keycard readers if access isn’t all |
| ButtonOnly | boolean | When enabled, forces players to interact with the buttons to open the door. |
| LinkName | string | The link name for doors |
| LinkDelay | number | How long the delay is before triggering other linked doors |
| LinkNoSound | boolean | When true, disables opening & closing sound when triggered by another linked door. |
| LinkWaitFinish | boolean | If true, this door will wait until other linked doors are done. |
| LinkRoomDependent | boolean | If true, only linked doors within the same room can trigger it. |
| InactiveFor | number | How long, in seconds, before the door becomes active after the start of a round. |
| OpenAfterInactivation | boolean | If true, the door will automatically open after InactiveFor duration has elapsed. |
| OpenAtStart | boolean | If true, the door will automatically open once loaded. |
| OnlyOnce | boolean | If true, the door can be only used once. |
| DeactivatePastCancelLimit | boolean | If true, the door will deactivate once the nuke cancel exceeds its limit |
| NukeOpen | boolean | If true, opens and locks the door when the Alpha Warhead detonates. |
Elevators allow players to link two areas to one another. Place all elevators within a Folder named Elevators.
An elevator can have multiple buttons as long as they’re named Button.
If you want your elevator to have support for more than two elevators, rename the button inside the elevator to InnerButton.
| Default Elevator Links | |
|---|---|
| SL_A | SL_B |
| GATE_A | GATE_A_2 |
| GATE_B | GATE_B_2 |
| LCZ_HCZ_A | LCZ_HCZ_B |
| LCZ_HCZ_CARGO | |
| SCZ_EZ |
.png)
You can edit an elevator’s properties by adding a Folder named Config within the elevator.
Additionally, at the bottom of the folder properties, press the + button to the right of Attributes to create a new attribute, these will control what is being modified.
| Name of Config | Attribute Type | What it does |
|---|---|---|
| ElevatorTime | number | Time it takes for the elevator to transport the players from one elevator to the other. |
| OpenTime | number | Time it takes for the elevator to open and close its doors. |
| Cooldown | number | Prevents the player from interacting with the elevator for some time. |
| CanSCPsBypass | boolean | Allows SCPs to bypass the access value when true. |
| ButtonCallTextureId | number | Changes the texture used when the elevator is ready for use. |
| ButtonWaitingTextureId | number | Changes the texture used when the elevator is not ready for use. |
| ButtonMovingTextureId | number | Changes the texture used when the elevator is in use. |
| ButtonTexturesEnabled | boolean | If false, the elevator buttons will not change textures depending on usability status. |
| InactiveFor | number | How long, in seconds, before the elevator becomes active after the start of a round |
Putting a Tag inside a model named _daytimeignore will cause the light to remain on, regardless of day or night. Must be inside a light source like SurfaceLight, PointLight or SpotLight.
Putting a string attribute named Tag with the value of HCZ will cause the room to use HCZ doors when connected to other rooms
If you want to prevent people from finding and using your rooms without permission, you can restrict your custom rooms/custom surfaces to specific servers.
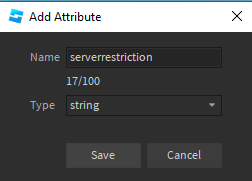
To do this, once you have built your room/surface, add the serverrestriction attribute to the Custom_Rooms folder. To do this, click on the plus sign in the Attributes tab, set the Name to serverrestriction and the Type string.
In the value, add the UserId of the user who owns the community/private server, for the rooms to be useable in that server. Check the example below
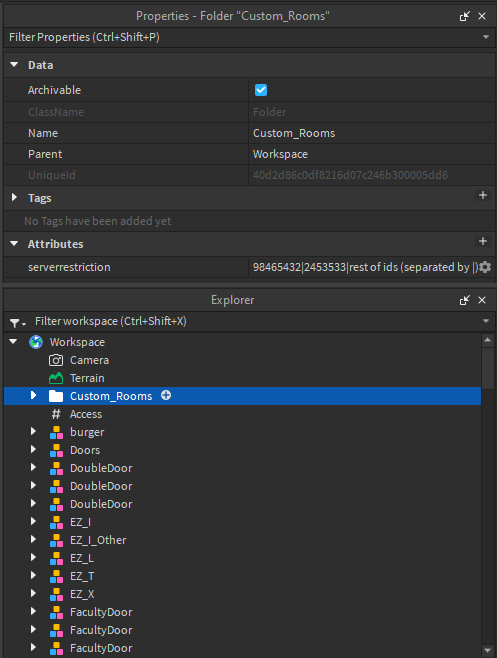
Additionally, it supports multiple IDs. Separate the IDs with |
If you want to add server restriction to your rooms, but you previously didn’t have it, it’s recommended that you delete the GitHub repository so it deletes the versions without the restriction. If someone finds your GitHub repository, they won’t be able to look at the history and find a version that doesn’t have server restriction.
¶ Plugin Configuration
Exporting rooms are an important part of room making, by exporting rooms, you can test them for your official room submissions, or to add custom rooms to your community server.
You won’t need to use this section if you plan to submit your room for the game in pscp-submissions (in the PSCP discord server), you’ll just need to send the room model
¶ Setting the room
Make sure to place your items, doors, lockers, kill bricks, spawns, and item givers in their respective folders for them to work properly. Once you are ready to export, you will now create a Folder in the workspace named Custom_Rooms, then put the grouped model inside the folder.
¶ Useful plugins
These plugins will help you with formatting and exporting your room.
¶ Description and usage
This plugin will help you with formatting your room, such as setting the folders up for you.
To utilize this plugin, you will first have to install it. Once you have installed this plugin, open Roblox Studio’s command bar which is located under the View tab, where you will use the commands provided by the plugin. To use the commands, you have to use the shared. prefix, then the function.
¶ Commands
| Command | Description |
|---|---|
shared.connectToRoot() |
By selecting one part and then selecting others, once you use this command it will create a Motor6D that connects all those selected parts to the first part. |
shared.count() |
Prints the number of selected base parts or base parts within a selected model. |
shared.doDoors() |
Formats the doors of a room model automatically. |
shared.doElevators() |
Formats the elevators of a room model automatically. |
shared.doItems() |
Formats the items of a room model automatically. |
shared.doLockers() |
Formats the lockers of a room model automatically. |
shared.fixDoors() |
Makes normal doors open/close correctly. Don’t use it on rotating doors. |
shared.formatRoom() |
Formats the room by doing the doors, items, lockers, and elevator folders for you and sets the primary part if Floor exists. Sometimes this command fails to format the items correctly. |
shared.makeCardRandom() |
Creates RandomCard items. Select the cards you want to randomize, then put a number from 1 to 3 inside the (). A higher number means better loot. |
shared.makeUnuseable() |
Turns the room model into something unusable which will be a pain to reuse. Use it on clones to not break your model. |
shared.openDoors() |
Opens selected doors, put a number within the () for how fast they will open or don’t put anything. |
shared.openLockers() |
Opens selected lockers, useful for when you want to place items inside them. |
shared.removeBlockMeshes() |
Removes all block meshes but keeps the appearance of parts. Beware as this affects every single blockmesh in the workspace. |
shared.removeCylinderMeshes() |
Same as removeBlockMeshes() but for cylinder meshes instead. Beware as this affects every single cylindermesh in the workspace. |
shared.removeSpecialMeshes() |
Same as the two above but for special meshes instead. |
shared.removeDuplicates() |
Attempts to remove all duplicated parts from a model, however, it’s not perfect and it’s not suggested to use it. |
shared.removeNearby() |
Removes nearby parts within a radius you specify inside (). |
shared.replaceModels() |
Replaces all models with the name ToReplace within the selected model. |
shared.selectRoot() |
(the developer forgot what this is for, most likely to select the root part a base part is connected to) |
shared.weld() |
Similar to connectToRoot() but uses WeldConstraints instead. |
shared.openMovables() |
Selecting a model or part with the Moveable attribute will open them in Roblox Studio. Some props in the propkit are Moveables. |
Some commands weren’t included, as normal users cannot use them and they were merely added to help the developer.
To export the room, you will need to have the PSCP Room Saver V5 plugin. Before you export, you first have to configure the plugin to meet your needs.
¶ Setting it up
To configure the plugin, you need to open the Roblox Studio’s command bar which is located inside the View tab. It is also recommended to open the command output.
| Command | Description |
|---|---|
_G.devkitsettings() |
Shows all the commands for the plugin. |
_G.devkitsettings.allowprint = true or false |
Allows to print the room’s code in the command output panel. |
_G.devkitsettings.allowsetscript = true or false |
Creates a script inside ServerScriptStorage where the room’s code will be located at. |
_G.devkitsettings.allowupload = true or false |
Automatically uploads your room’s code to a website like GitHub or Pastebin. You need to have an account linked first! |
_G.devkitsettings.encrypt = true or false |
Encrypts your room’s code so no one can steal it. |
_G.devkitsettings.promptsavescript = true or false |
If enabled, it will prompt you to save your room’s code as a .lua file on your computer. |
_G.devkitsettings.reloadroom = true or false |
If enabled, once you export your room, it will show how it would look in-game. If you do enable this, make sure to make a copy of your room model, as it deletes your room model and replaces by the reloaded model, which sometimes can be broken. |
_G.devkitsettings.usetestbuild = true or false |
Used only by the game developers to test new versions of the plugin. |
¶ Exporting
Once you have configured your plugin, you will now click on the plugin’s icon in the Plugins tab. Depending on how you configured your plugin, it might print into the command output, save as a script, or save inside your computer. Your room’s code should look gibberish; don’t worry, it’s supposed to be like that. Now, you will open/save this code in a notepad, then make sure to copy all the raw code for it to export properly.
¶ Using your room in your map
Now, for this part, you will need a GitHub account.
¶ Uploading your room to GitHub
Once you have created a GitHub account, create a new repository by clicking on this button in the top left corner.
On the new repository configuration, add a name to your repository and make sure your repository is public, or else the room will not appear in Map Maker

Then, click on the button “uploading an existing file” and paste/upload your room data file from your computer.

After that, click on your repository’s name here.

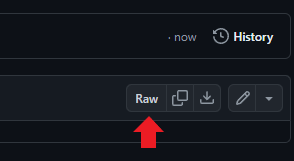
You’ll be sent to this page, and then click on the “raw” button located on the right part
Finally, copy the link to the page you’ll be sent to.

After all these steps, you will go into the Map Builder V3 game, you can load up one of the maps from Project: SCP Map IDs or one of your maps.
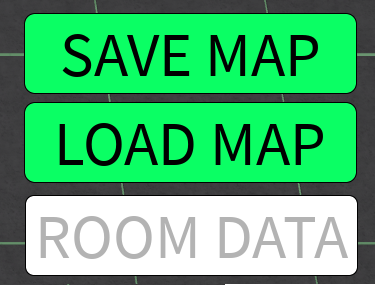
Once the map is successfully loaded (if you loaded one), you will write the /setrooms command in the game chat and then paste the link you copied from GitHub (e.g. /setrooms [link]). If everything was done correctly, the room should be loaded and placed in the “Custom” folder. Place the room across the map, then click on the button “save map”, copy the link, and load it in your private or community server.

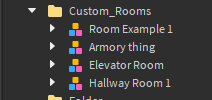
In order to use multiple custom rooms in the same map, you’ll need to put all your formatted custom room models in the Custom Rooms folder. After that, you’ll upload the folder to GitHub, and once you follow the previous steps correctly, all rooms will appear in the “Custom” folder in the Map Maker. Remember to give your rooms different names!
Using the Room Saver plugin and the Map Maker, you can create your own custom surface to replace the default one. To do this, follow the same steps for creating a room, and export it alone using the Room Saver plugin. After you upload the room data to GitHub and copy the raw link, go into the Map Builder V3 game and use the /setsurface command in the game chat, alogn with the copied link from GitHub. (e.g. /setsurface [link]).
If you did everything correctly, you should be able to see your custom surface in the Map Maker!
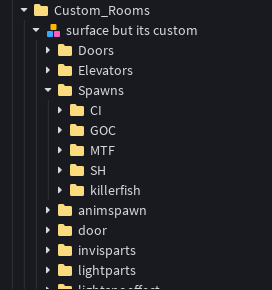
You can make elevators with the GATE_A | GATE_A2 | GATE_B | GATE_B2 links (if you don’t want to use the default gates, you can also create your own links) to connect it with the gates, and create spawns named MTF, CI. GOC and SH to allow factions to spawn (or use custom spawns like a normal custom room).
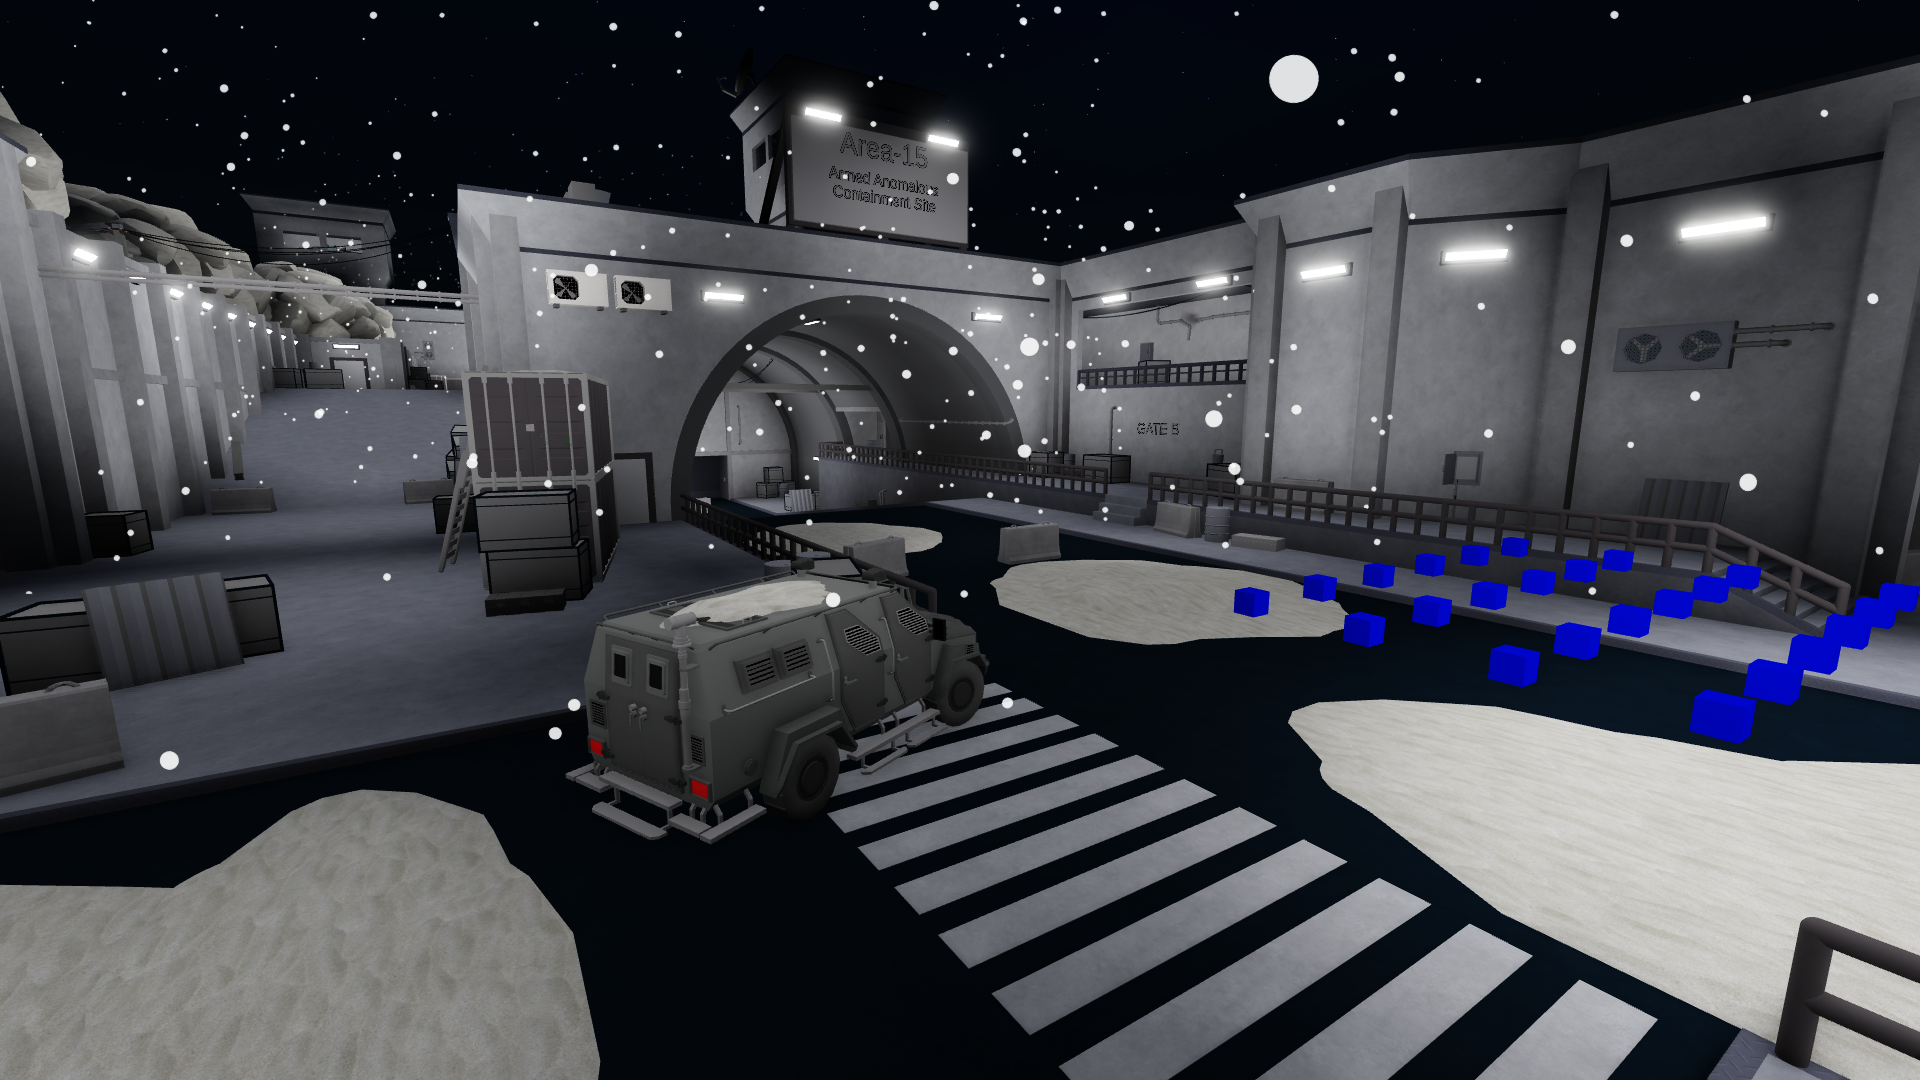
Remember that you must export the surface room model alone, and you can also use custom rooms along with a custom surface, just make sure to use the /setsurface and /setrooms commands separately!
¶ P:SCP Private/Community Server
You will now join your private/community server. Using the admin panel, you will navigate to the “Custom Map” section, put any name for the map, and then paste the RAW code you got from Map Builder V3. Once done so, navigate to the “Map Settings” section, press your custom map, and then start the round using the “Start Round” setting in the “Server Settings”. You can now find the room you just made in the spots you placed it in the map builder.
